

Concrete countertops have surged in popularity, bringing a sleek, modern, and industrial vibe to kitchens and bathrooms alike. Many homeowners love concrete surfaces for their bold look and lasting strength, but the real magic happens when you add a custom stain. Learning how to stain concrete countertops allows you to infuse your space with unique color, depth, and personality.
Staining not only elevates the visual appeal but also provides an opportunity for creative expression, ranging from earthy tones to vibrant hues, subtle washes to dramatic effects. This guide walks you step by step through every phase of the staining process, helping you avoid common pitfalls and ensuring professional-level results whether tackling a new installation or reviving an older surface.

By the end, you’ll be equipped to give your concrete countertops a beautiful, lasting transformation that is truly your own.
Understanding Concrete Staining
What is Concrete Staining?
Concrete staining is a specialty finishing technique that imparts color to the countertop by allowing pigments to penetrate directly into the surface. Unlike paint, which sits on top and can chip or peel, stains soak into the microscopic pores, creating a permanent and natural-looking effect.
This difference means stained concrete retains much of its organic look and won’t hide the unique features—like subtle cracks and swirls—that make each piece one-of-a-kind.
Acid-based stains chemically react with the minerals in concrete to produce variegated, earthy colors and marbled nuances. Water-based stains use pigments that are absorbed into the surface, resulting in brighter, more uniform colors and a wider spectrum of choices. In both methods, the outcome is a lively and authentic finish that’s not easily replicated by other materials or techniques.
Benefits of Staining Concrete Countertops
Staining concrete countertops offers both practical and aesthetic advantages. One of the standout benefits is durability; when sealed properly, the stain resists fading, scratching, and wear from daily use. Stained countertops are also remarkably easy to maintain, requiring only basic cleaning to look their best. On the style front, stains provide nearly endless creative freedom.
You can opt for subtle shades that act as a neutral backdrop or bold, vibrant tones that serve as a design focal point. Finally, compared to installing new surfaces, learning how to stain concrete countertops is an affordable way to achieve a high-end, customized look without a full overhaul.
Preparing for the Staining Process
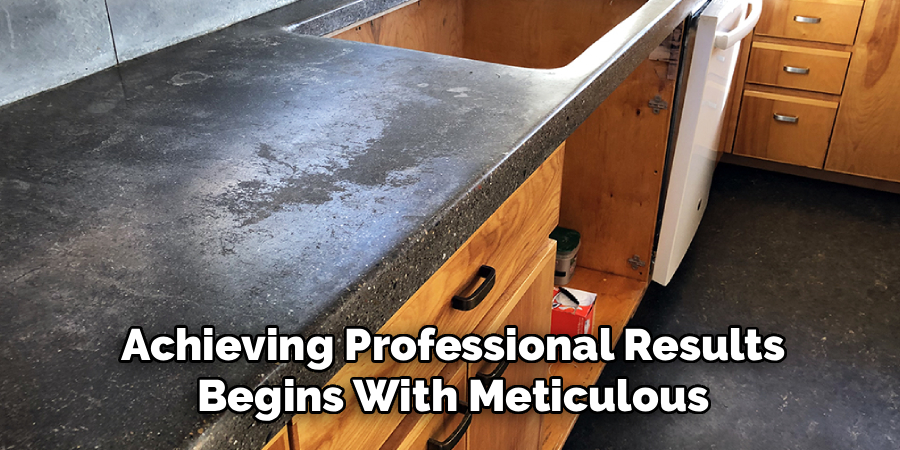
Achieving professional results begins with meticulous prep. First, clear everything off the countertop—appliances, décor, utensils—so you have a clean slate. Any dust or debris that remains can affect how well the stain adheres. Next, protect the surrounding area with painter’s tape or plastic sheeting. Cover cabinets, floors, backsplashes, and walls adjacent to the surface to prevent splatter and stains.
Thorough cleaning is essential. Use a degreasing cleaner or mild dish soap and warm water to scrub away grease, oil, or food residue. A clean surface allows the stain to penetrate evenly and prevents blotchy, discolored patches.
Now, decide on your stain type. Acid-based stains are best for natural, variegated effects, while water-based options offer more control and color variety. Consider your overall design goals, the ambiance you want to create, and any manufacturer recommendations for your concrete’s sealer type.
Always read and follow product instructions—some stains are compatible only with specific primers or require special ventilation. Gathering all required safety gear at this stage, including gloves and goggles, will protect you from splatters and chemical exposure.
Cleaning and Repairing the Concrete Surface
Pre-Cleaning Steps
Before you begin staining, it’s important to start with a spotless foundation. Begin by sweeping the countertop thoroughly to remove dust, crumbs, and loose debris. Next, mix a gentle detergent with warm water in a bucket and scrub the surface with a sponge or non-abrasive pad.
Work systematically, paying close attention to stains left by coffee, oil, or other substances—these can show through the final color if not treated. Rinse with clean water and let the countertop dry completely.
Repairing Cracks and Imperfections
Examine the surface for cracks, chips, or spalling. Minor faults can be repaired using concrete patching compound or filler designed for countertops. Follow package instructions, smoothing the filler with a putty knife and feathering it to blend seamlessly with the surrounding area. For deep or wide cracks, you may need to let the repair cure before moving to the next step.
Proper repairs not only enhance the finished look but also help keep stains uniform and prevent moisture from seeping in.
Ensuring Smoothness
Once the patches are set and the surface is dry, sand the entire countertop with fine-grit sandpaper (usually 220 grit or higher). This eliminates leftover residue, old finishes, and surface irregularities. For best results, use a hand sander or sandpaper block, always moving in gentle, circular motions. Wipe away dust with a tack cloth or vacuum to ensure a pristine surface. A flawlessly smooth surface is vital for stain penetration and a professional finish.
Choosing the Right Stain for Your Countertop
Choosing the correct stain starts with understanding the two main types:
- Acid-Based Stains: These react chemically with the concrete to produce rich, earthy tones and complex, marbled appearances. While color choices are somewhat limited, they deliver exceptional depth and variation, creating a stone-like appearance.
- Water-Based Stains: Featuring a wider palette—from subtle neutrals to bold and bright—water-based stains penetrate the concrete with less unpredictability. They’re ideal for projects requiring vivid, consistent color.
Think about your design preferences, overall budget, and how the finished countertop will coordinate with the rest of your room. Consider the amount of natural and artificial lighting the space receives, as this can influence how the color appears throughout the day.

Certain stains—particularly acid-based—require adequate ventilation and protective gear due to chemical fumes. If you or your household has sensitivities, water-based stains may offer a safer alternative. Always test your chosen stain on a small, inconspicuous area to gauge the final result.
How to Stain Concrete Countertops: Applying Process
Tools and Equipment
For a successful staining job, assemble these tools:
- Quality brushes or foam rollers for detailed application
- A spray bottle or pump sprayer for uniform coverage, especially with acid stains
- Protective gloves, safety glasses, and a mask or respirator (particularly for acid-based products)
- Painter’s tape to mask off edges
- Clean rags, sponges, and disposable containers for mixing
Step-by-Step Process
- Mix the Stain: If your product requires dilution, follow the manufacturer’s ratio. Always stir well to distribute pigments evenly.
- Test Coverage: Apply a small amount of the stain to a hidden spot to confirm your desired color and finish.
- Apply the First Coat: Working in sections, use your brush, roller, or sprayer to apply the stain evenly. Keep strokes consistent and avoid overlapping, which can create visible lines. If using a sprayer, maintain a steady hand and thorough coverage.
- Work in Small Sections: Move methodically across the countertop, blending as you go. On large surfaces, have a helper or work quickly to maintain even application and prevent lap marks.
- Layer for Depth: Allow the first coat to dry according to product instructions (often several hours). Additional coats can be applied to darken the color or achieve variegated effects. Let each coat dry fully before applying the next.
- Remove Excess Liquid: Use a clean, dry rag to blot up any puddles or streaks that form—a key to a flawless finish.
- Assess and Touch Up: After the stain dries, inspect for missed spots or unevenness. Spot-treat as needed and let the surface cure completely, usually overnight, before moving on to sealing.
Sealing the Stained Concrete Countertop
Why Sealing is Essential
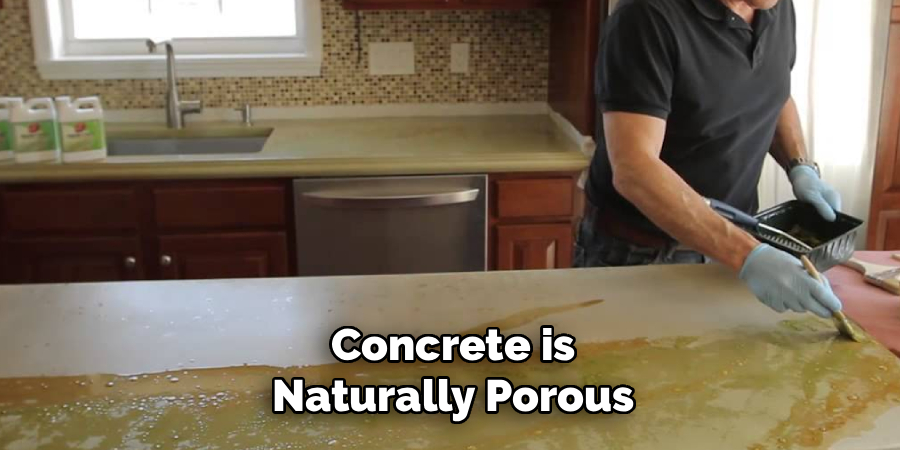
Concrete is naturally porous, meaning it can absorb liquids, stains, and odors easily. A good-quality sealer acts as a shield, locking color in place and protecting your custom finish from scratches, moisture, and daily wear. Sealing also enhances the depth and luster of the stained color, giving it a professional look and extending the life of your countertop.
How to Seal Properly
- Clean and Prep: Ensure the countertop is dust-free and fully dry before sealing.
- Choose the Right Sealer: Select a sealer compatible with your stain type—acrylic and polyurethane sealers are common. For food-prep surfaces, make sure the product is non-toxic and food-safe.
- Application: Apply the sealer with a new foam roller or brush in thin, even layers. Avoid over-applying, which can cause cloudiness or bubbling.
- Layer for Protection: Most sealers require two or more coats for optimal protection. Allow each coat to dry thoroughly before adding the next.
- Cure Time: Let the sealed countertop cure for 24–48 hours (check your product guidelines) before using the surface for daily activities. Avoid placing hot pots or sharp objects directly on the freshly sealed surface until fully cured.
Achieving Your Desired Finish
Matte, Glossy, or Satin Finishes
The final appearance of your countertop depends on the finish you select. Matte sealers provide a natural, understated look ideal for minimal or industrial-themed spaces. Glossy finishes magnify color depth and impart a polished, high-end feel.
Satin finishes strike a balance, reflecting some light while keeping glare to a minimum. When choosing, consider your room’s style, lighting, and maintenance preferences. Glossy surfaces reveal smudges and fingerprints more easily, while matte options tend to hide them.
Experiment with sample boards or hidden areas, if possible, to see how the sealer alters the underlying color. Every stain and sealer combination will yield slightly different results depending on product formulas and application methods.
Maintaining a Stained Concrete Countertop
Daily Cleaning Tips
Routine care is simple but crucial for maintaining the beauty of your stained and sealed countertop. Wipe up spills promptly with a soft, damp cloth to prevent surface marks and preserve the finish. For everyday cleaning, use mild, pH-neutral soap and water. Avoid abrasive sponges, harsh chemicals, or acidic cleaners, as these can dull the sealer or damage the stain over time.
Recommended Maintenance Products
Stick to cleansers specifically designed for sealed stone or concrete surfaces. Some companies produce gentle sprays that clean without leaving a residue. To revive luster, you can use a countertop-safe polish once every few months, but always check that it’s compatible with your sealer.
Monitor the surface over time: reseal the countertop every 1–3 years, depending on usage and the specific product instructions. This keeps your finish looking fresh and protects both stain and underlying concrete from long-term wear or staining.
Troubleshooting Common Issues
Even with the best preparation, issues can sometimes arise. Blotchy or uneven stain results often stem from inadequate cleaning or poor surface prep. If you notice patchy coloring, you may be able to blend it with additional stain layers or by gently sanding and reapplying in small areas.
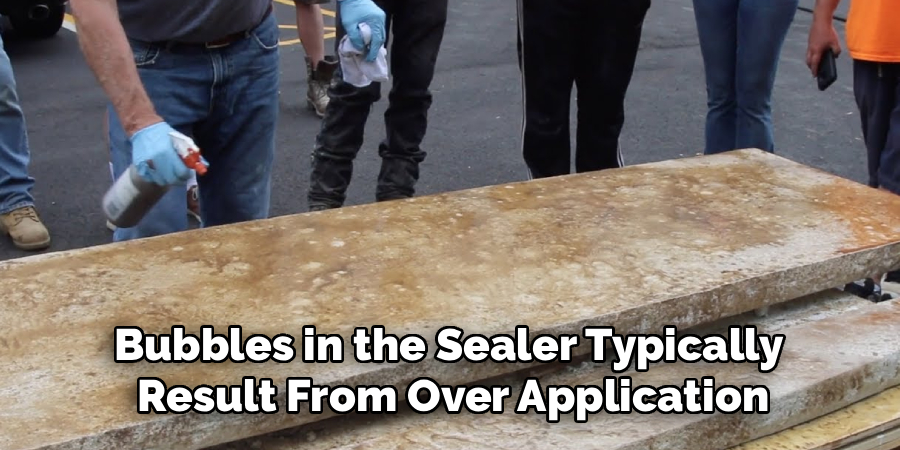
Bubbles in the sealer typically result from over-application or applying to a damp surface. Lightly sand and recoat the affected area according to the sealer’s instructions. If you see efflorescence (white, powdery deposits), this may indicate moisture traveling through the concrete. Allow the countertop to dry thoroughly before resealing, and check for hidden leaks or humidity issues nearby.
Prevent problems by reading all product labels and following instructions precisely. Testing on a small section before treating the entire surface helps catch potential issues early.
Creative Ideas for Customizing Stained Concrete Countertops
Personalizing your concrete countertops is part of the fun. For a unique twist, try layering stains in different colors to achieve a marbled effect, or mix custom shades for depth and dimension. Water-based stains make it especially easy to create bold statement pieces or intricate patterns.
If you’re feeling creative, consider adding stenciled designs or borders using painter’s tape or cut-out templates. Metallic or pearl additives can be worked into stains or sealers for extra shimmer and drama. For a rustic touch, combine stains to mimic the rich veins of natural stone or the look of weathered wood. Let your imagination lead the way—just remember to keep a light hand and test each new technique on a spare surface first.
Conclusion
Learning how to stain concrete countertops empowers you to transform your kitchen or bathroom with a finish that’s as practical as it is beautiful. From choosing between acid-based or water-based stains to prepping, applying, sealing, and maintaining, each step unlocks greater potential for creativity and personalization.
With careful preparation, the right products, and attention to detail, anyone can achieve stunning results. Staining is a cost-effective way to renew tired counters or customize new ones, offering durability and style that lasts.
By following this comprehensive guide, you ensure your countertop not only stands out visually but also withstands the demands of daily life. Take pride in your unique project, and let your stained concrete countertop become a focal point that tells your design story for years to come.

About
Diane Lo is a distinguished figure in the world of kitchen innovation and culinary design, with over a decade of expertise creating functional and sustainable kitchen environments. Her professional focus lies in merging ergonomic spatial planning with modern culinary technology, fostering kitchen layouts that are both highly practical and aesthetically refined. As the lead expert at Kitchenub, Diane Lo delves into the art and science of kitchen organization, appliance selection, and workflow efficiency, inspiring home cooks and professional designers alike.
Education
Royal Melbourne Institute of Technology (RMIT University) (Melbourne, Australia) Associate Degree in Interior Design and Spatial Planning Focus on sustainable kitchen layouts, user-centric design, and ergonomic efficiency. Gained hands-on experience in high-traffic commercial kitchen modeling and advanced space-saving architecture.
Nottingham Trent University (United Kingdom) Bachelor’s in Product Design and Culinary Architecture (Honors) Specialized in the intersection of kitchen technology and lifestyle design. Participated in major industry collaborations, working with premium appliance manufacturers and cabinetry firms to gain real-world insights into modern kitchen workflows.
Publications and Impact
At Kitchenub, Diane Lo shares her expert insights on kitchen renovation processes, material durability, and strategies for achieving peak culinary productivity. Her writing effectively bridges the gap between professional culinary needs and home design, making it an essential resource for those looking to transform their kitchen into a highly efficient and welcoming heart of the home.