

Opening a whip cream bottle might seem straightforward, but it requires a bit of care to ensure proper handling and avoid spills or accidents. Whether you’re using it for desserts, beverages, or culinary creations, following the correct steps makes the process quick and mess-free. This guide will help you with how to open whip cream bottle easily and safely.

Common Whipped Cream Products
Whipped cream is available in various forms and products, catering to different needs and preferences. The most common is aerosol whipped cream, which comes in pressurized cans and is convenient for quick use. Tub whipped cream, often found in frozen or refrigerated sections, offers a more versatile option for those who prefer to scoop and spread.
For a more traditional approach, some opt for whipping cream, which is a liquid cream that can be whipped by hand or with a mixer to achieve the desired consistency. Additionally, dairy-free and vegan options have gained popularity, made with ingredients like coconut cream or almond milk to accommodate dietary restrictions. No matter the product, each variation serves as a delightful topping or key ingredient in numerous recipes.
Type of Whipped Cream Container
When it comes to whipped cream containers, there are several types available to suit different preferences and needs. The most common option is the aerosol can, which dispenses pre-made whipped cream with the press of a nozzle, providing convenience and consistency.
Another popular choice is the reusable whipped cream dispenser, often used by professionals and home enthusiasts, which allows for the creation of fresh whipped cream using cream and pressurized gas cartridges. Lastly, for those who prefer a more hands-on approach, traditional mixing bowls and whisks or hand mixers remain a reliable method for whipping cream manually. Each type of container offers unique benefits, catering to a wide range of culinary styles and requirements.
10 Methods How to Open Whip Cream Bottle
1. Understanding the Type of Whipped Cream Bottle
Before attempting to open a whipped cream bottle, it is essential to identify the type of container you are working with. Whipped cream is typically sold in two forms: pressurized aerosol cans and whipped cream dispensers that require a charger.
The way you open these differs significantly. Aerosol cans usually come ready to use and require only the removal of a protective cap, whereas dispensers must be disassembled to add cream and a gas charger. Understanding the design and intended use of your whipped cream bottle will help avoid mistakes, spills, or damage to the container.

2. Removing the Cap from an Aerosol Whipped Cream Can
Most ready-to-use whipped cream bottles come as aerosol cans with a plastic cap covering the nozzle. To open the bottle, simply grip the cap firmly and lift or twist it off, depending on its design. Some caps may be tight due to pressure or cold temperature, so warming the cap slightly with your hands can help loosen it.
Once the cap is removed, you will see the nozzle through which the cream is dispensed. Always make sure the can is upright before removing the cap to prevent accidental spraying.
3. Inspecting the Nozzle for a Protective Seal
In some aerosol whipped cream cans, the nozzle may be covered by a small protective seal to preserve freshness or prevent accidental dispensing. Carefully inspect the nozzle after removing the cap.If there is a small plastic or foil seal, peel it away gently. Avoid using sharp tools to remove this seal as it may puncture the nozzle or cause the cream to spray unexpectedly. Once the seal is removed, the bottle is ready for use.
4. Shaking the Bottle Before Use
Opening a whipped cream bottle isn’t just about physical access—it also involves preparing it for dispensing. For aerosol cans, it’s crucial to shake the bottle vigorously for 10–15 seconds. This action ensures that the nitrous oxide (N₂O) gas inside the can mixes evenly with the cream, creating the fluffy texture when dispensed. Failing to shake the can may result in a watery or uneven output. Always shake before each use, even if you’ve already opened the can earlier in the day.
5. Attaching the Nozzle to a Whipped Cream Dispenser
For those using a refillable whipped cream dispenser, the opening process is a bit more complex. Begin by unscrewing the top portion of the dispenser, which separates the lid from the main canister. Insert your heavy cream, sweetener, and flavorings into the container. Next, reattach the lid tightly and screw the nozzle onto the metal head of the dispenser. Some models offer different tips, so select your desired style for decorative topping. Make sure the tip is firmly in place to avoid leaks during dispensing.

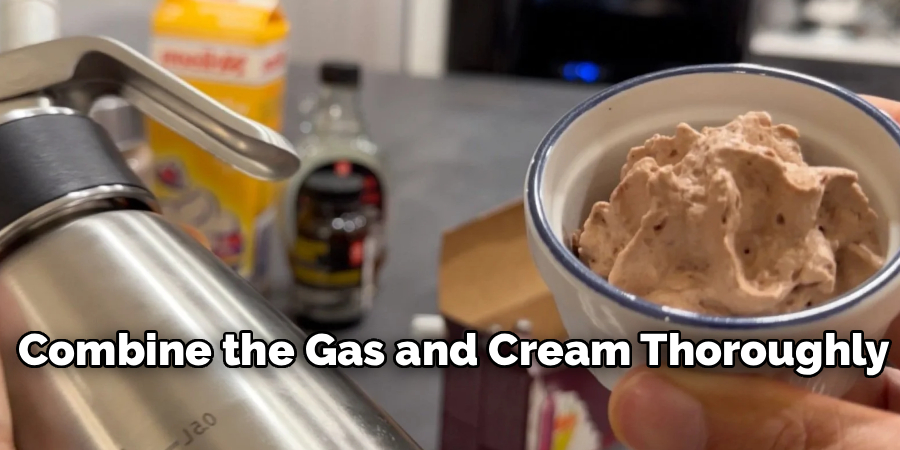
6. Inserting and Activating the Gas Charger in Dispensers
To operate a whipped cream dispenser, you must use a gas charger (usually nitrous oxide). Insert the charger into the holder and screw it onto the side nozzle until you hear a hissing sound, indicating that the gas has been released into the container. Once charged, the dispenser is ready to use. Always shake the dispenser vigorously for 15–20 seconds to combine the gas and cream thoroughly. Do not try to open the dispenser immediately after charging, as internal pressure could be dangerous.
7. Cleaning the Nozzle Before First Use
Even before dispensing whipped cream, it is wise to clean the nozzle—especially for refillable dispensers that might retain residue from previous use. Detach the nozzle and rinse it with warm water. For aerosol cans, use a clean damp cloth to wipe the external tip, especially if you suspect dust or debris. Cleaning ensures hygienic use and prevents blockages. A clogged nozzle can lead to inconsistent spray patterns or a blocked valve.
8. Dispensing the Whipped Cream Correctly
To dispense whipped cream after opening the bottle, hold the can or dispenser upside down. Point the nozzle toward your desired surface—typically a dessert or beverage—and press gently on the nozzle or trigger. For aerosol cans, pressing the nozzle releases the gas and cream mixture, forming a light, fluffy texture. For dispensers, squeezing the handle does the job. Always use slow, steady pressure to avoid over-dispensing or spraying the cream unpredictably.
9. Replacing the Cap or Disassembling After Use
After using your whipped cream bottle, it is important to store it properly. For aerosol cans, wipe off the nozzle and replace the plastic cap to keep the nozzle clean and prevent drying. Store it upright in the refrigerator. For whipped cream dispensers, release any remaining pressure by gently squeezing the handle over a sink. Then unscrew the top, remove leftover cream, and wash all components—especially the nozzle and gas charger holder—with warm, soapy water. Allow all parts to dry before reassembling or storing.

10. Troubleshooting a Stuck or Jammed Bottle
Sometimes, a whipped cream bottle may appear sealed even after opening due to a jammed nozzle or thickened cream blocking the flow. If your aerosol can is not dispensing, first check the nozzle for dried cream and clean it with warm water. Shake the can again and try pressing more firmly. For whipped cream dispensers, ensure the gas charger was activated properly and that the mixture is not too thick. If needed, disassemble and clean all parts, then reassemble for another attempt. Patience and proper cleaning usually resolve these issues without wasting the cream inside.
Maintenance and Upkeep
Regular maintenance of your aerosol cans and whipped cream dispensers can prevent common issues and extend their lifespan. After each use, thoroughly clean the nozzle or dispenser parts to remove any residue that might block the flow during the next use. For whipped cream dispensers, disassemble the components, including the nozzle and gasket, and wash them with warm, soapy water. Ensure all pieces are completely dry before reassembling to avoid rust or mold development. Store aerosol cans upright in a cool, dry place to maintain consistent pressure and prevent the contents from thickening. Periodic checks and proper cleaning routines are essential for keeping your equipment in great condition and ready for optimal performance.
Safety Considerations
When using aerosol-based equipment like whipped cream dispensers or similar devices, safety should always be a top priority. Always follow the manufacturer’s instructions to avoid misuse or accidents. Never expose aerosol cans to high heat or open flames, as they are pressurized and can explode under extreme temperatures. Additionally, inspect your equipment regularly for signs of wear, damage, or improper seals, as these can lead to leaks or malfunctions. When handling cartridges, ensure they are punctured correctly and used in well-ventilated areas to prevent excessive gas exposure. Proper storage and mindful usage are critical to ensuring both personal safety and the longevity of your tools.
Conclusion
Opening a whipped cream bottle may seem straightforward at first, but the process can vary based on the type of container. Whether you are using a convenient aerosol can or a refillable dispenser, each method requires specific steps to ensure safety, cleanliness, and optimal performance. Thanks for reading our blog post on how to open whip cream bottle! We hope you found it helpful and informative.
About
Diane Lo is a distinguished figure in the world of kitchen innovation and culinary design, with over a decade of expertise creating functional and sustainable kitchen environments. Her professional focus lies in merging ergonomic spatial planning with modern culinary technology, fostering kitchen layouts that are both highly practical and aesthetically refined. As the lead expert at Kitchenub, Diane Lo delves into the art and science of kitchen organization, appliance selection, and workflow efficiency, inspiring home cooks and professional designers alike.
Education
Royal Melbourne Institute of Technology (RMIT University) (Melbourne, Australia) Associate Degree in Interior Design and Spatial Planning Focus on sustainable kitchen layouts, user-centric design, and ergonomic efficiency. Gained hands-on experience in high-traffic commercial kitchen modeling and advanced space-saving architecture.
Nottingham Trent University (United Kingdom) Bachelor’s in Product Design and Culinary Architecture (Honors) Specialized in the intersection of kitchen technology and lifestyle design. Participated in major industry collaborations, working with premium appliance manufacturers and cabinetry firms to gain real-world insights into modern kitchen workflows.
Publications and Impact
At Kitchenub, Diane Lo shares her expert insights on kitchen renovation processes, material durability, and strategies for achieving peak culinary productivity. Her writing effectively bridges the gap between professional culinary needs and home design, making it an essential resource for those looking to transform their kitchen into a highly efficient and welcoming heart of the home.