

Drying parsley in the oven is a quick and efficient way to preserve this flavorful herb for long-term use. Whether you have an abundance of fresh parsley from your garden or leftover sprigs from cooking, drying allows you to minimize waste while ensuring you have a convenient supply on hand. The process is simple, requires minimal tools, and retains much of the herb’s vibrant flavor and aroma. Understanding how to dry parsley in the oven can help in maintaining it properly and troubleshooting common issues that may arise over time.

Selecting and Preparing Parsley for Drying
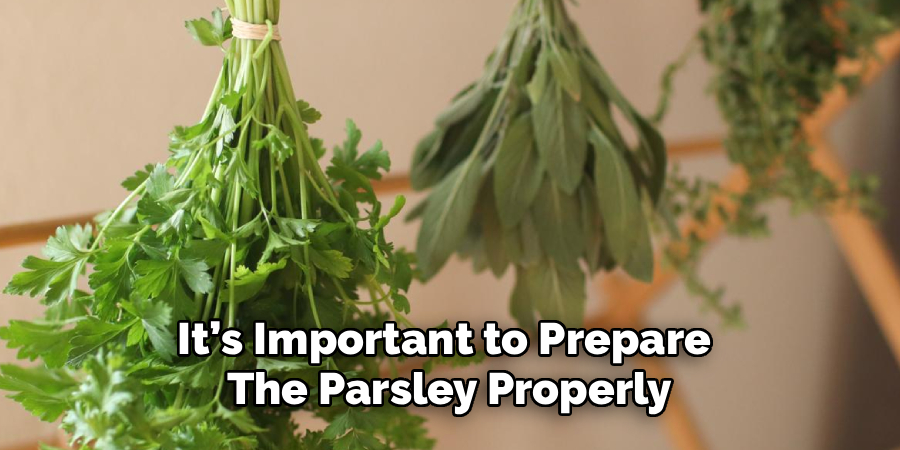
To achieve the best results when drying parsley, it’s important to start with fresh, high-quality leaves. Choose bright green parsley with firm stems and no signs of yellowing, wilting, or decay. Both flat-leaf and curly parsley varieties can be dried effectively, so select the type that suits your preferences or culinary needs. Once selected, rinse the parsley thoroughly under cool running water to remove any dirt or debris. Gently pat the leaves dry with a clean towel or use a salad spinner to remove excess moisture. Ensuring the parsley is clean and dry before oven-drying helps preserve its vibrant flavor and prevents mold or contamination during the drying process.
Tools and Supplies Needed
To successfully oven-dry parsley, you will need a few basic tools and supplies to ensure an efficient and smooth process. Gather the following items before starting:
- Fresh parsley (washed and dried)
- Baking sheets or trays
- Parchment paper or silicone baking mats
- An oven with reliable temperature control
- A clean, sharp kitchen knife (optional, for trimming stems)
- An airtight container or glass jar for storage
- Labels or markers (optional, for labeling storage containers)
Having these tools and supplies ready in advance will streamline the preparation and drying process, allowing you to maintain the parsley’s freshness and quality effectively.
10 Methods How to Dry Parsley in the Oven
1. Select Fresh, Healthy Parsley for Best Results
The first and most crucial step in drying parsley is choosing fresh, healthy herb bunches. Harvest parsley in the morning after the dew has dried but before the sun becomes too hot, which helps preserve the maximum flavor and essential oils. Select parsley with bright green leaves free from yellowing, spots, or wilting. Freshness ensures that the herb’s flavor and aroma remain robust after drying. Rinse the parsley gently under cool water to remove dirt, insects, or residues, and pat it dry thoroughly with a clean towel to avoid excess moisture, which can prolong drying time or promote mold.
2. Prepare the Parsley by Removing Stems and Rough Sorting
Before drying, it’s important to prepare the parsley properly. While some prefer drying whole sprigs, removing most of the thick stems will speed drying and reduce unwanted bitterness. Separate the tender leaves and small stems from the woody main stems and discard or compost the latter. Sorting the parsley into similarly sized pieces promotes uniform drying. Spread the leaves and small stems out on a clean surface or tray to allow any residual moisture to evaporate before placing them in the oven.
3. Preheat the Oven to a Low Temperature
Parsley is delicate and loses flavor quickly if exposed to high heat. Preheat your oven to its lowest setting, ideally between 90°F and 110°F (32°C to 43°C). Since most ovens do not show such low temperatures, set it to the lowest possible setting and prop the oven door slightly open with a wooden spoon or heatproof object to let moisture escape and reduce overheating. Using an oven thermometer can help you monitor the temperature closely. Low, gentle heat dries parsley evenly and preserves its color and essential oils.
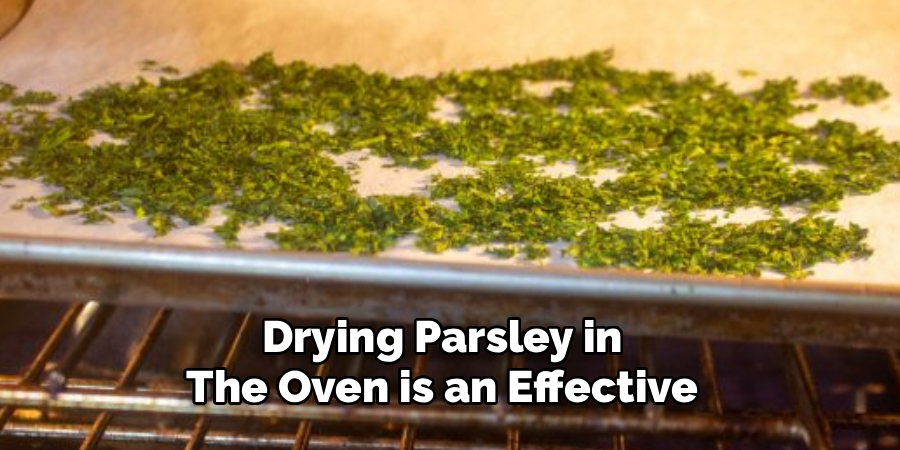
4. Arrange Parsley in a Single Layer on Baking Sheets
Place the prepared parsley leaves and small stems in a thin, even layer on baking sheets lined with parchment paper or silicone mats. Avoid piling or overlapping the parsley, as crowding traps moisture and slows drying. Using parchment paper prevents sticking and makes it easier to remove the dried parsley once ready. If drying large amounts, use multiple trays and rotate them periodically during drying to ensure consistent heat distribution and airflow.
5. Dry Parsley Slowly and Monitor Frequently
Oven drying parsley is a gradual process that generally takes between 30 minutes to 2 hours, depending on the oven, humidity, and amount of parsley. Place the trays in the oven and allow the herb to dry slowly, checking every 15 to 20 minutes to monitor progress. Stir or gently toss the parsley halfway through drying to promote even dehydration and prevent any portions from burning. The parsley is ready when the leaves feel crisp and crumble easily between your fingers without any softness or moisture.
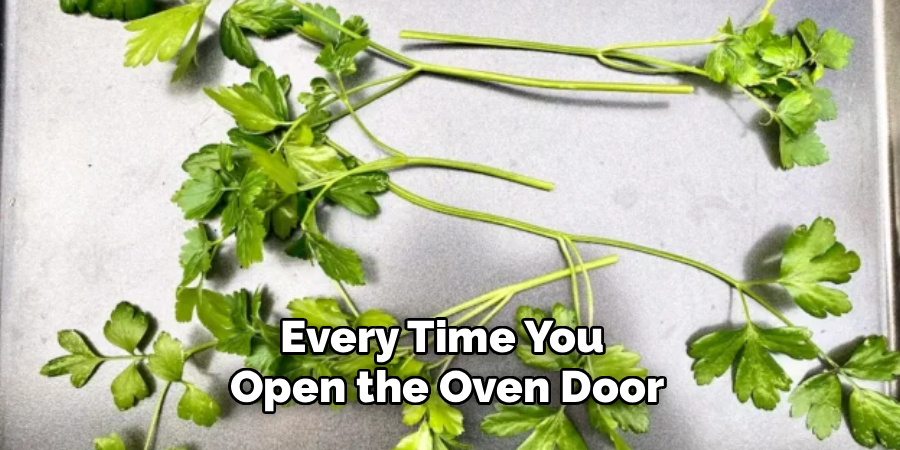
6. Use the Oven Light and Window to Minimize Door Opening
Every time you open the oven door, heat escapes and moisture enters, extending drying time and risking uneven results. Use the oven light and window to visually monitor the parsley’s drying progress instead of opening the door frequently. Limiting door openings maintains a consistent temperature and airflow, ensuring more efficient drying. This simple step improves overall drying quality and helps preserve the bright green color of the parsley.
7. Cool the Dried Parsley Completely Before Storage
Once the parsley has dried to the desired crispness, remove the baking sheets from the oven and allow the herb to cool completely at room temperature. Cooling is important because warm parsley packed into containers traps residual moisture, which can cause mold or spoilage during storage. Spread the dried parsley on a clean tray or plate to air out if needed. Proper cooling also prevents condensation inside storage containers, maintaining the herb’s texture and flavor.
8. Crush or Leave Whole According to Usage Preference
After cooling, you may choose to crush the dried parsley leaves gently by hand or with a mortar and pestle, depending on your culinary preferences. Crushing releases aromatic oils, enhancing flavor when used as a seasoning. Alternatively, you can leave the dried leaves whole for garnishing or infusing into dishes. Store the parsley in your preferred form for maximum versatility in cooking.
9. Store Dried Parsley in Airtight Containers Away from Light
Proper storage is essential to maintain the quality of oven-dried parsley. Transfer the cooled, dried herb into airtight containers such as glass jars with tight-fitting lids, resealable plastic bags, or vacuum-sealed pouches. Store these containers in a cool, dark, and dry place, away from direct sunlight and heat sources, as light and heat accelerate loss of color and flavor. Well-stored dried parsley retains its potency for up to one year, making it a handy kitchen staple.
10. Use Oven-Dried Parsley to Enhance a Variety of Dishes
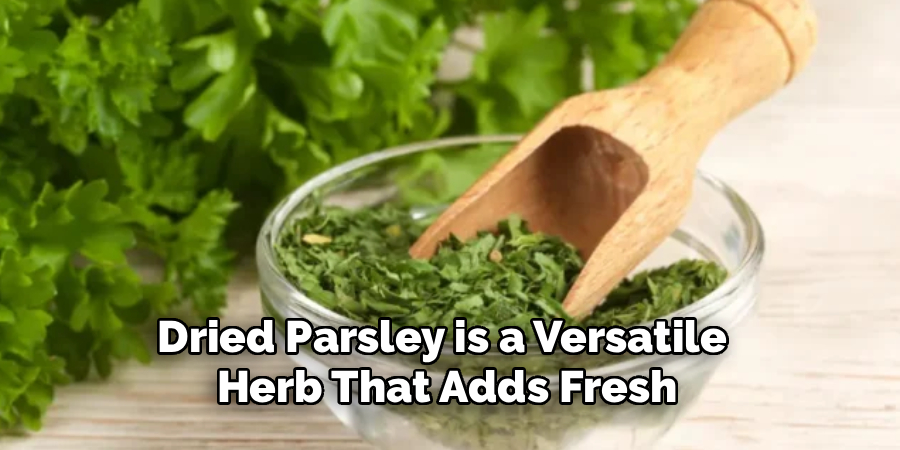
Dried parsley is a versatile herb that adds fresh, vibrant flavor to countless dishes. Sprinkle it over soups, stews, sauces, and salads, or use it as a garnish for meats, vegetables, and pastas. Since dried parsley is more concentrated than fresh, use it sparingly—usually about one-third the quantity of fresh parsley called for in recipes. You can also rehydrate dried parsley by soaking it briefly in warm water before adding it to recipes where fresh texture is preferred. Oven-dried parsley not only enhances flavor but also brings the comforting aroma of homegrown herbs to your cooking year-round.
Maintenance and Upkeep
Proper maintenance and storage are essential to ensure the quality and longevity of dried parsley. Always store dried parsley in an airtight container, preferably made of glass, and keep it in a cool, dark place away from direct sunlight and humidity. This prevents the loss of its vibrant color and flavor over time. Regularly check the container for any signs of moisture or spoilage, and give it a gentle shake to ensure even distribution of the herb. For optimal quality, it’s recommended to use dried parsley within 6-12 months, as its flavor tends to diminish with age. By taking these simple steps, you can enjoy the taste and aroma of your dried parsley for months to come.
Troubleshooting Common Issues
Even with proper storage, you might encounter some challenges when preserving dried parsley. Here are a few common issues and how to address them:
- Loss of Flavor: If your dried parsley seems to have a weaker flavor, it may have exceeded its optimal usage period. Always label your containers with the date of drying and replace the herb when it no longer provides the desired taste.
- Moisture Build-Up: If you notice clumping or dampness, the container might not be airtight, or it could have been exposed to high humidity. Transfer the parsley to a better-sealed container and consider adding a food-safe silica gel packet to absorb excess moisture.
- Discoloration: Fading or browning of the herb can result from prolonged exposure to light or heat. Ensure the storage location is cool and dark, and avoid placing the container near stoves or windows.
- Off Odor: A musty or odd smell could indicate spoilage. Discard the parsley immediately, clean the container thoroughly, and only store fresh, completely dried parsley inside.
By addressing these issues promptly, you can maintain the quality and freshness of your dried parsley for extended use.
Conclusion
Drying parsley in the oven is an effective and convenient method to preserve the herb’s fresh flavor and bright green color. By carefully selecting fresh parsley, preparing it thoughtfully, using gentle oven temperatures, and monitoring the drying process closely, you can create high-quality dried parsley perfect for culinary use. Cooling, proper storage, and mindful usage further ensure that your dried parsley retains its aromatic qualities and enhances your meals long after harvest season. Thanks for reading our blog post on how to dry parsley in the oven! We hope you found it helpful and informative.
About
Diane Lo is a distinguished figure in the world of kitchen innovation and culinary design, with over a decade of expertise creating functional and sustainable kitchen environments. Her professional focus lies in merging ergonomic spatial planning with modern culinary technology, fostering kitchen layouts that are both highly practical and aesthetically refined. As the lead expert at Kitchenub, Diane Lo delves into the art and science of kitchen organization, appliance selection, and workflow efficiency, inspiring home cooks and professional designers alike.
Education
Royal Melbourne Institute of Technology (RMIT University) (Melbourne, Australia) Associate Degree in Interior Design and Spatial Planning Focus on sustainable kitchen layouts, user-centric design, and ergonomic efficiency. Gained hands-on experience in high-traffic commercial kitchen modeling and advanced space-saving architecture.
Nottingham Trent University (United Kingdom) Bachelor’s in Product Design and Culinary Architecture (Honors) Specialized in the intersection of kitchen technology and lifestyle design. Participated in major industry collaborations, working with premium appliance manufacturers and cabinetry firms to gain real-world insights into modern kitchen workflows.
Publications and Impact
At Kitchenub, Diane Lo shares her expert insights on kitchen renovation processes, material durability, and strategies for achieving peak culinary productivity. Her writing effectively bridges the gap between professional culinary needs and home design, making it an essential resource for those looking to transform their kitchen into a highly efficient and welcoming heart of the home.